
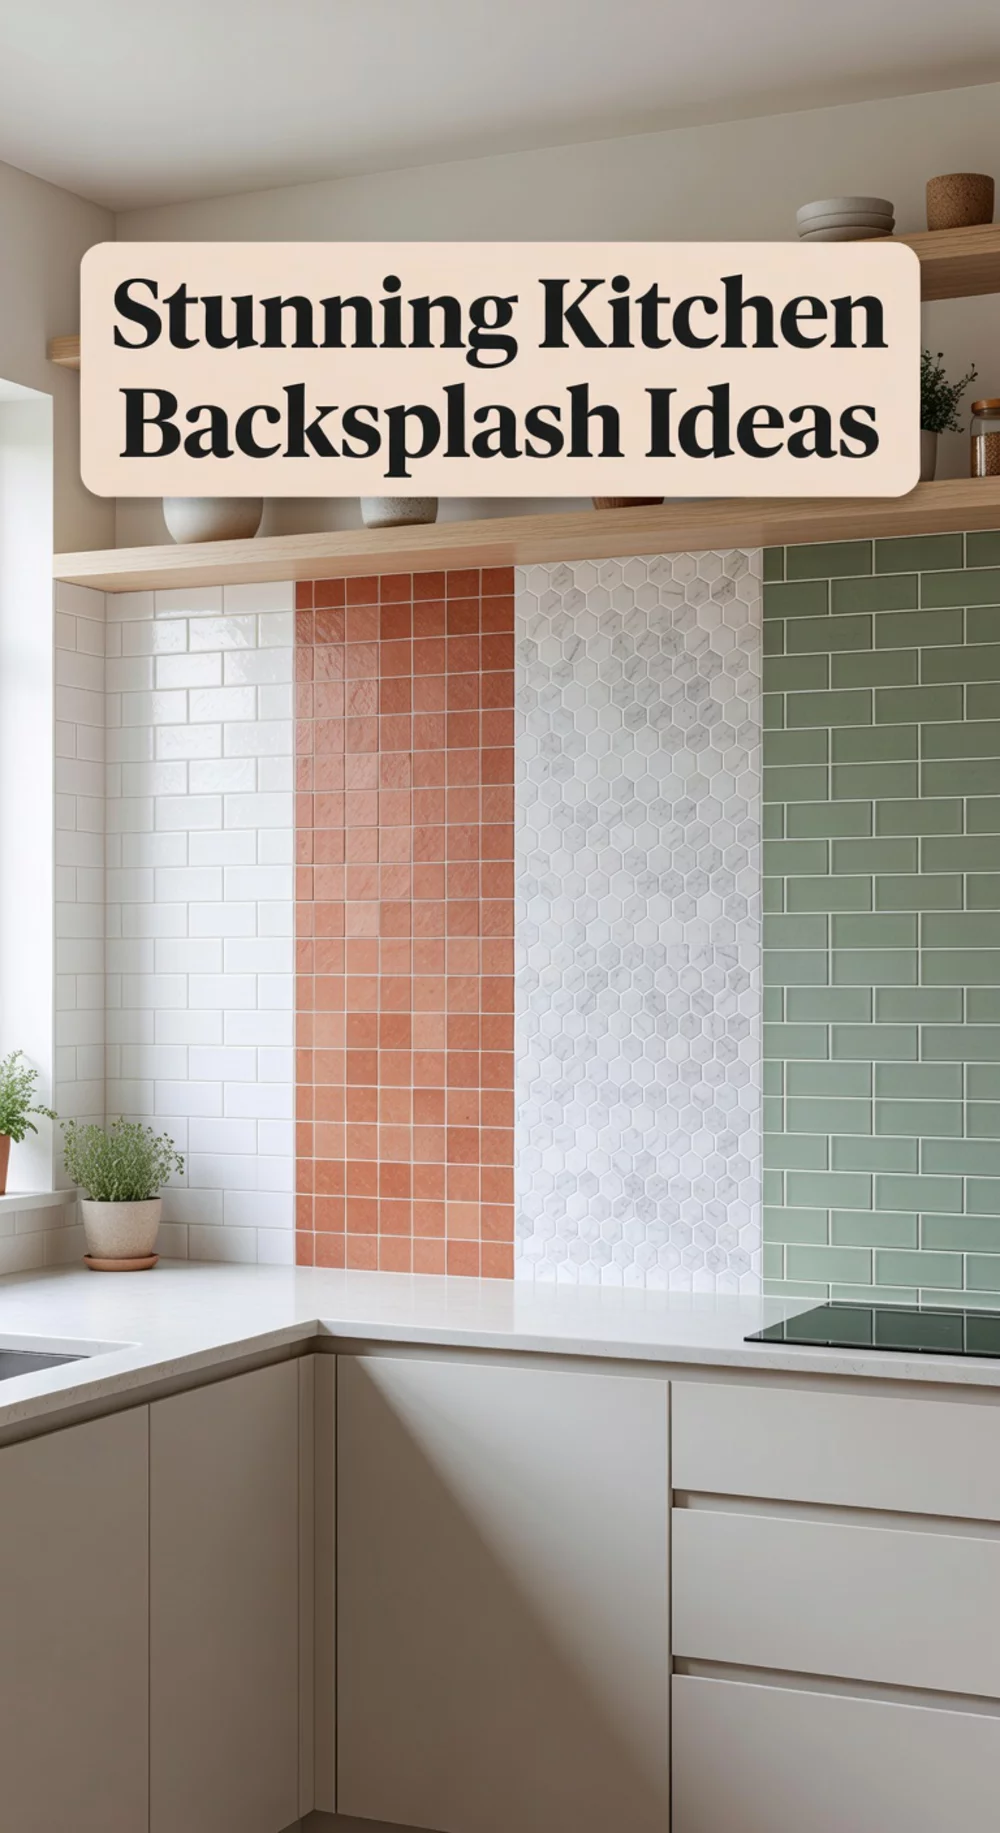
Updating your kitchen with a stunning backsplash can feel overwhelming, especially with so many options available. But don’t worry; we’ve gathered 7 creative ideas that can effortlessly enhance your kitchen's aesthetic and transform the entire space.
Transform your kitchen with a timeless subway tile look.
As an Amazon Associate I earn from qualifying purchases. Affiliate links may earn me a commission at no extra cost to you.
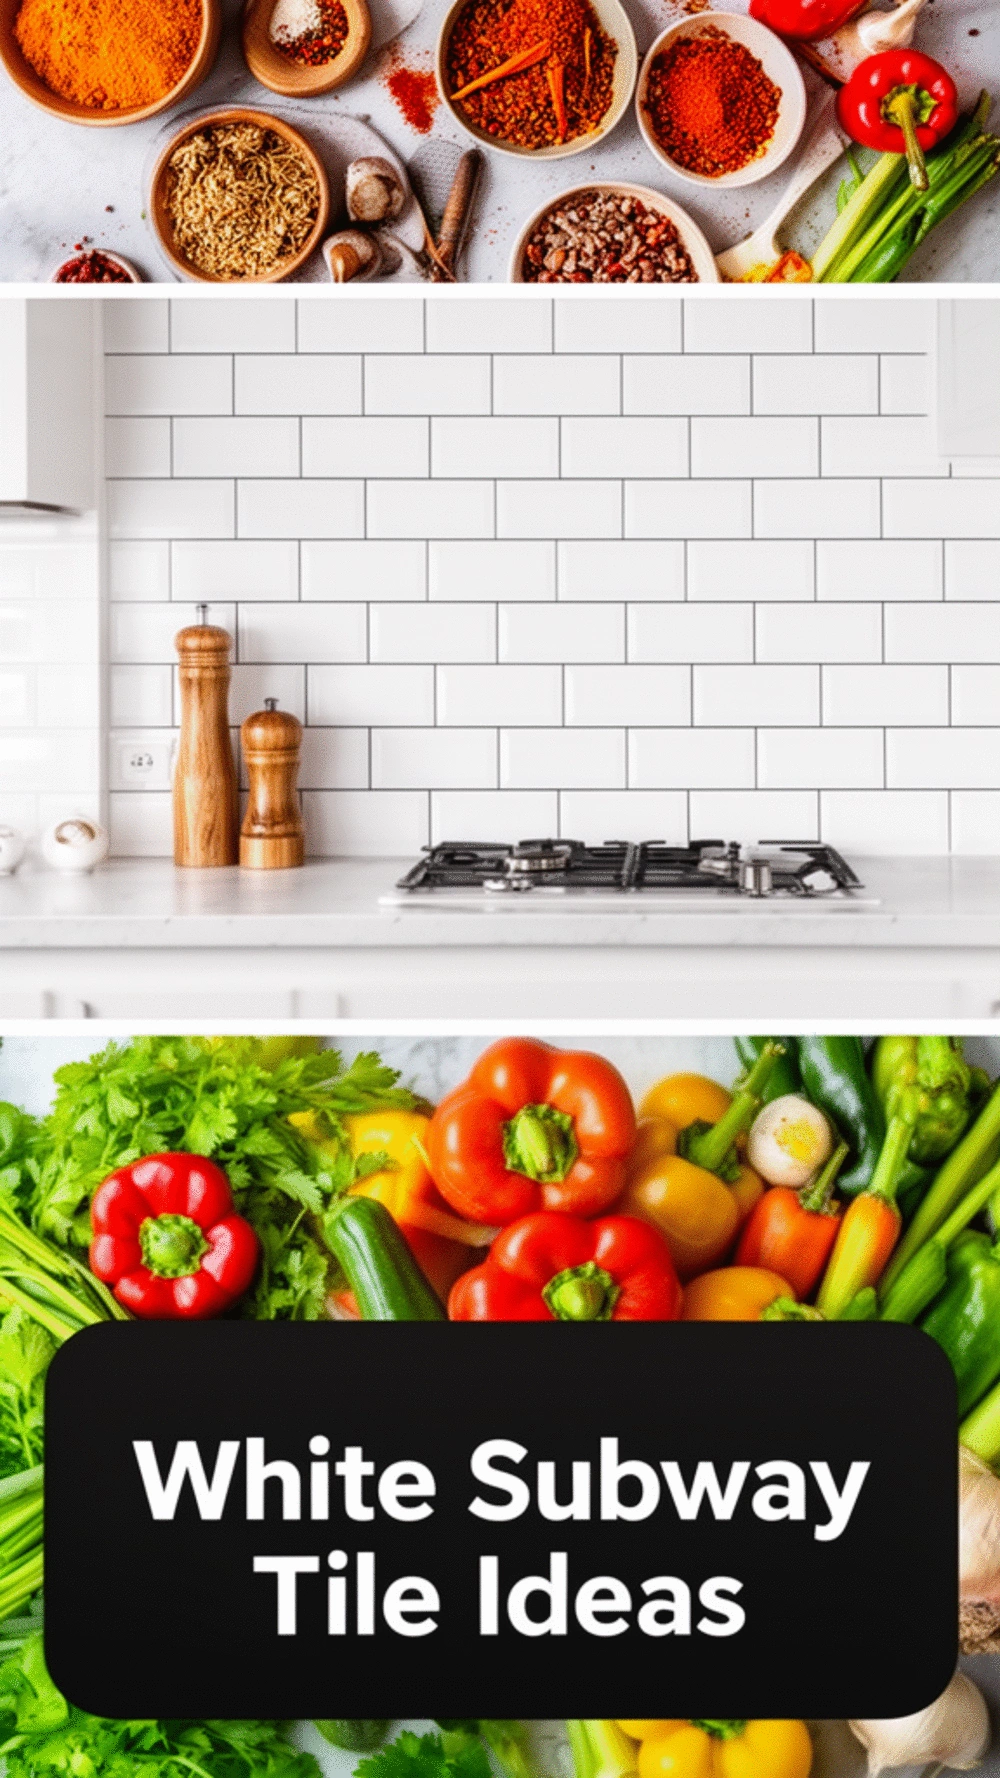
Understanding the Allure of White Subway Tiles: White subway tiles offer a classic design that fits seamlessly into both modern and rustic kitchens. The slim dark grout lines create a stunning visual contrast that enhances the overall aesthetic, making your kitchen feel larger and more inviting. This combination not only looks great but is also practical.
What often gets overlooked is the impact of lighting on your grout color choice. Choosing a darker grout can enhance the tile's crisp lines, but without proper lighting, it might not pop as intended. For instance, in a brightly lit kitchen, the contrast can be striking, while softer lighting might mute that effect.
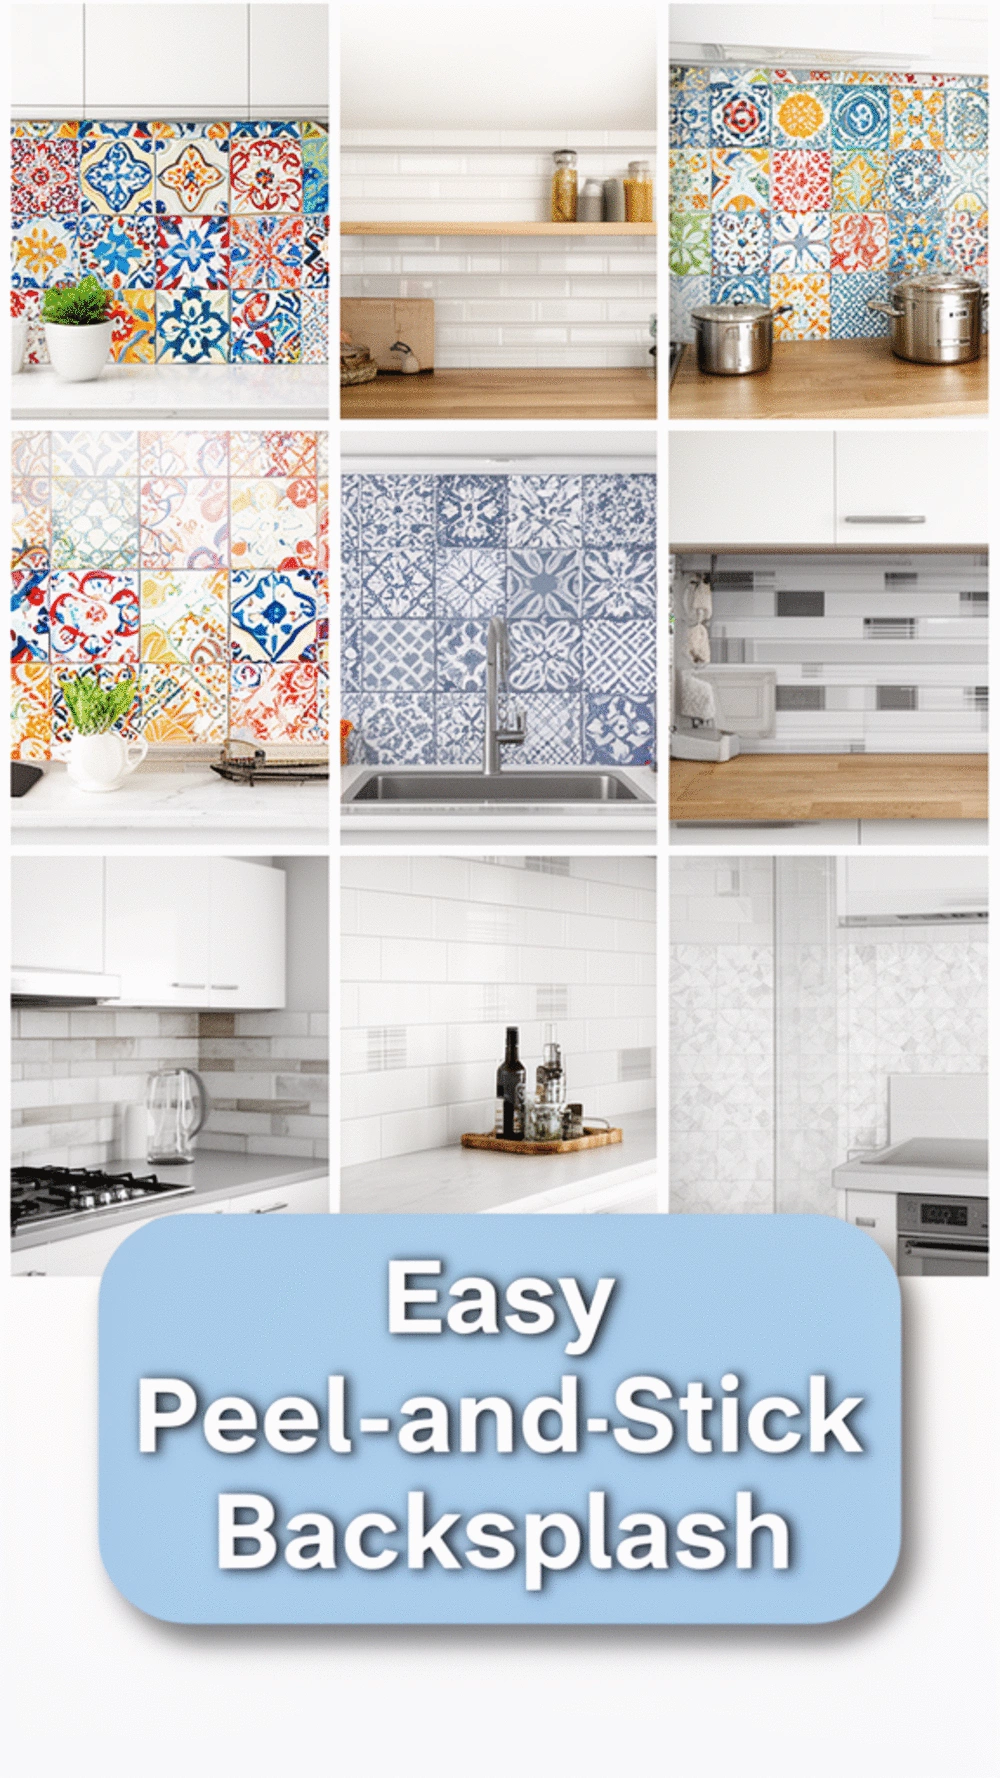
This peel-and-stick tile is ideal for creating a modern backsplash in kitchens and bathrooms.
View on Amazon →These tiles are perfect for covering dirty walls and adding elegance to any space.
View on Amazon →This product enhances any space with an elegant and modern look effortlessly.
View on Amazon →📋 Quick Tips:
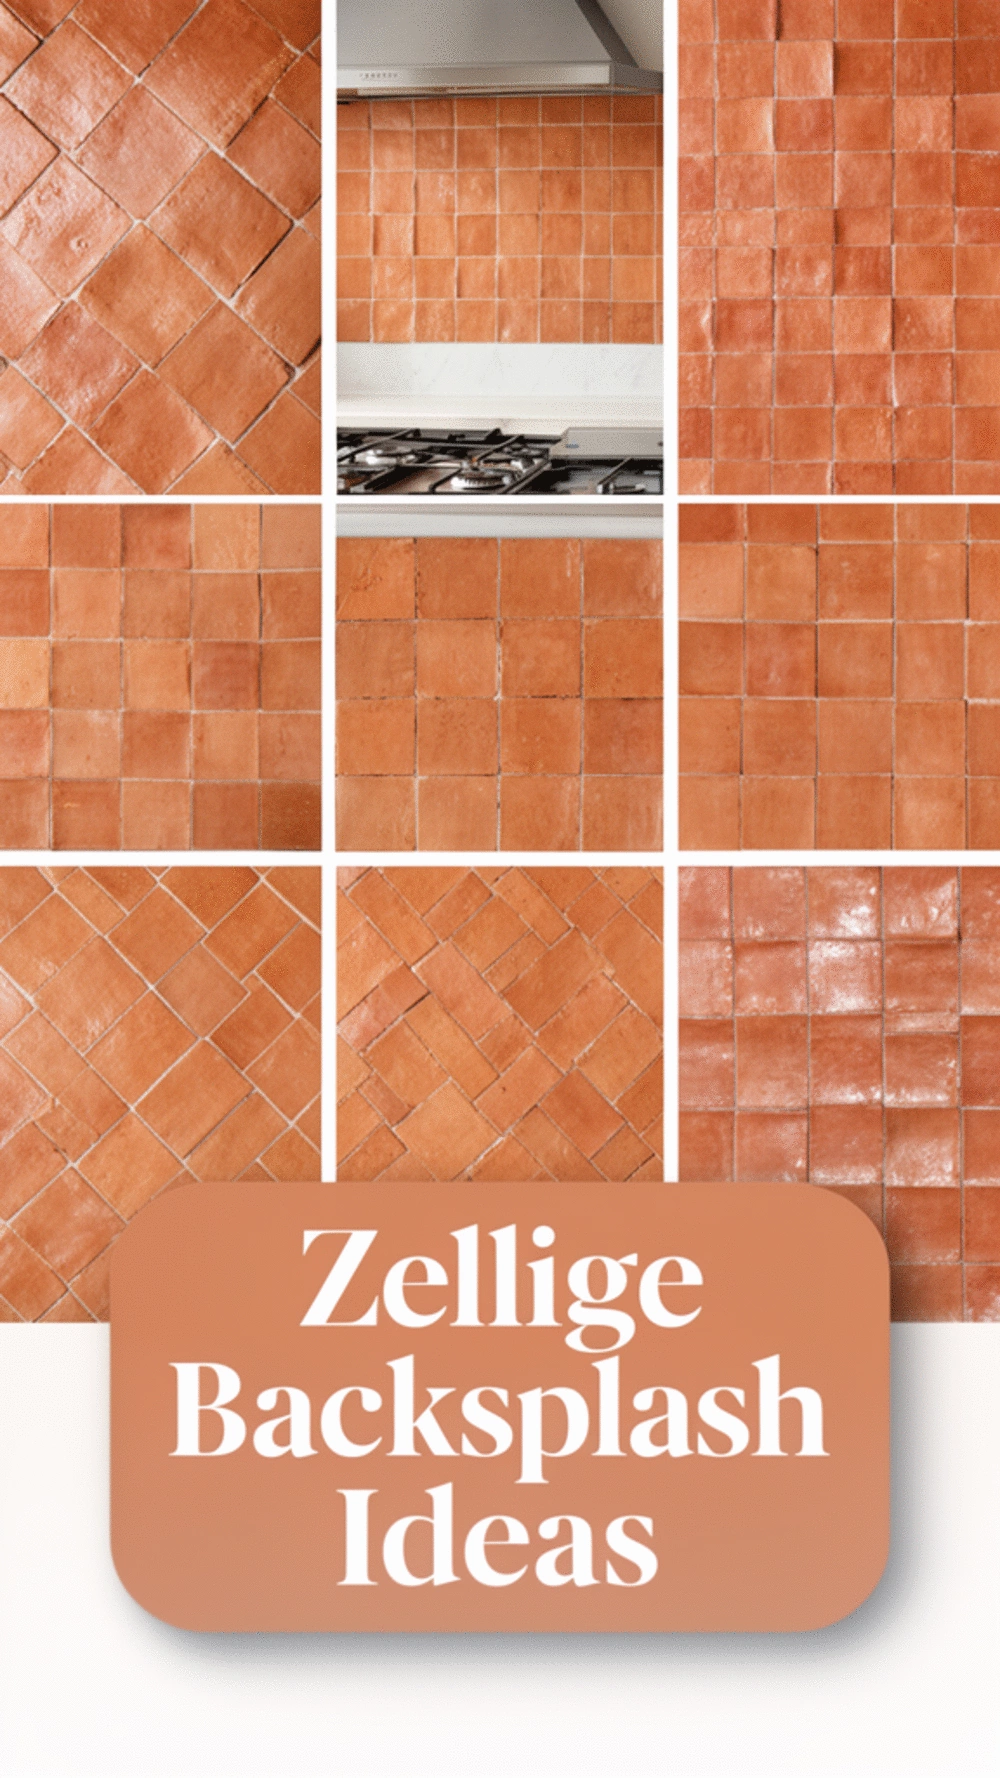
Transform your kitchen with the warmth and charm of zellige tiles.
Why Zellige Backsplash Tiles Shine: Zellige tiles, known for their handcrafted charm, add a beautiful depth to your kitchen. The warm terracotta tones create an inviting atmosphere, enhancing any decor style. Plus, their unique texture and color variations ensure that your backsplash will be a stunning focal point.
What People Rarely Consider: Many overlook the importance of surface preparation. For instance, failing to clean the wall thoroughly can hinder the adhesive properties of zellige tiles, leading to peeling or uneven appearance. Taking the time to ensure a clean, dry surface will make all the difference in your backsplash's durability.
Luxurious touch with a cooler palette, perfect against warm terracotta backgrounds.
View on Amazon →Achieve the artisanal charm of zellige with easy installation and maintenance.
View on Amazon →Add a beautiful patterned design to complement the zellige aesthetic wonderfully.
View on Amazon →💡 Quick Tips:
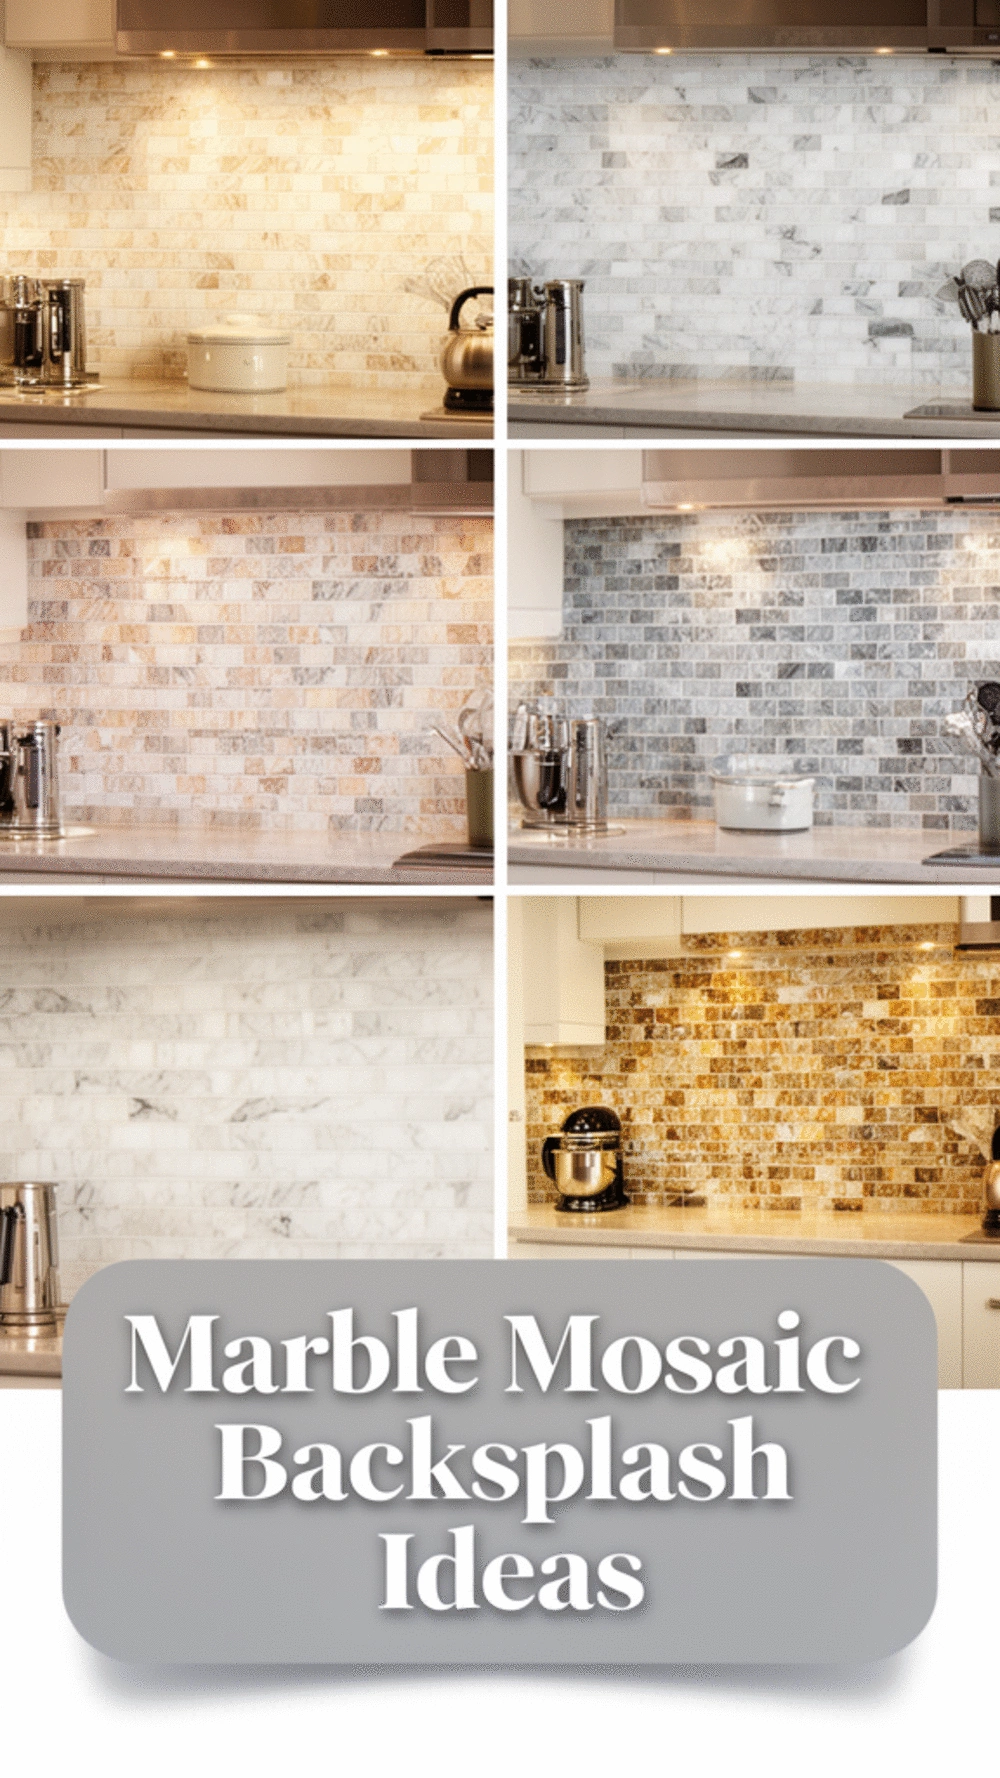
Transform your kitchen with the elegance of marble mosaics.
The Impact of Marble Mosaic Backsplashes: Marble mosaic tiles are a stunning choice to add a touch of luxury to compact kitchen spaces. Their natural veining and light-reflecting qualities can create an illusion of spaciousness while infusing warmth and sophistication. Ideal for both modern and traditional kitchens, these tiles not only enhance visual appeal but also offer durability that stands the test of time.
A common mistake people make with marble is pairing it with heavy colors or cluttered patterns that can detract from its inherent elegance. For instance, placing a dark cabinet right next to marble can overshadow its beauty. Instead, opt for lighter hues to allow the marble to shine. This simple choice can transform your kitchen atmosphere entirely.
Modern elegance is achieved effortlessly with these tiles, enhancing your space beautifully.
View on Amazon →Add a luxurious look to your walls effortlessly with this eco-friendly option.
View on Amazon →Enhance your decor with a beautiful design that suits any kitchen style.
View on Amazon →💡 Best Practices:
Transform your rental kitchen with stylish and temporary backsplash options.
Why Peel-and-Stick Tiles are Perfect for Renters: Peel-and-stick tiles offer a versatile solution for renters seeking to personalize their kitchens without damaging walls. Available in a variety of styles and patterns, these tiles are easy to install and remove, making them perfect for temporary upgrades.
Where Most People Get Stuck: Many renters underestimate the importance of properly preparing the surface before applying peel-and-stick tiles. Not cleaning the wall thoroughly can lead to poor adhesion, resulting in tiles lifting or peeling off sooner than expected. Always wipe down the area and let it dry completely before installation for the best results.
These Square Peel and Stick Tiles are perfect for renters wanting a stylish, removable backsplash option.
View on Amazon →These Peel and Stick Kitchen Tiles effortlessly elevate any space with their elegant look.
View on Amazon →The Self-Adhesive Subway Tiles are great for covering walls and adding elegance.
View on Amazon →⚡ Best Practices:
You're doing great exploring all these backsplash possibilities! Taking action, even in small ways, shifts everything in your kitchen's aesthetic. Remember, this journey is about finding what truly resonates with your style, not about achieving immediate perfection.
💡 Simple Reminders:
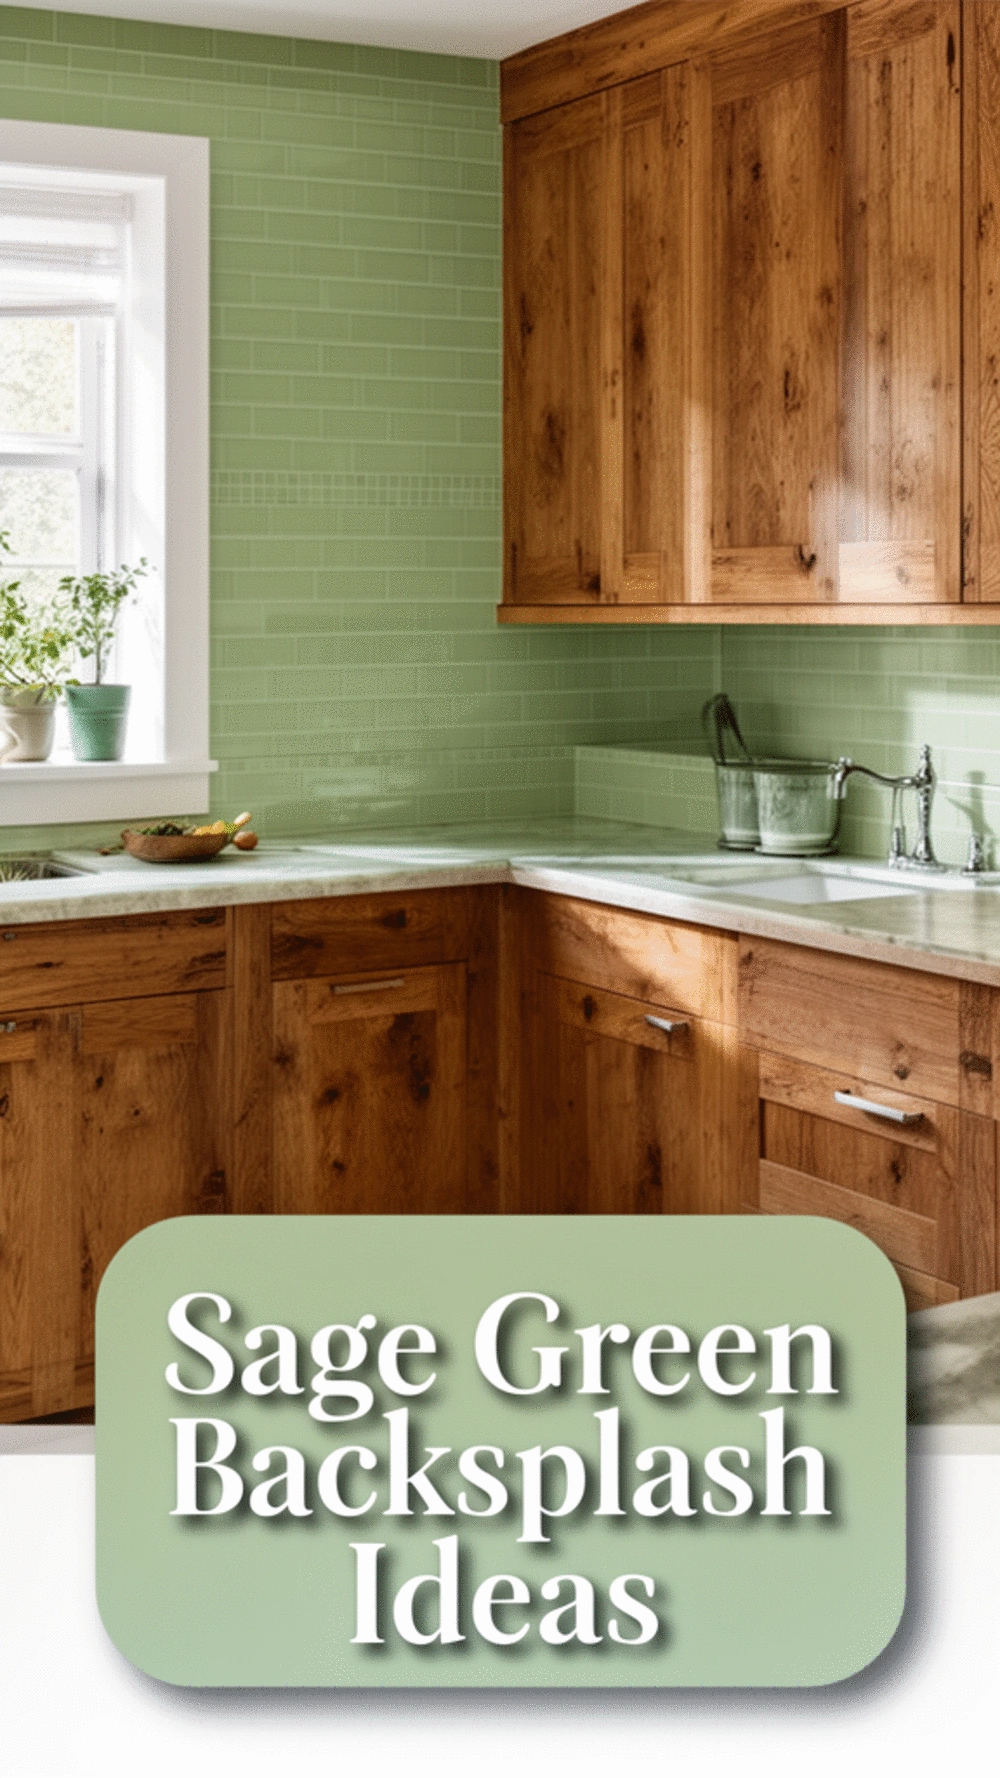
Transform your kitchen with soothing sage green tiles and warm wood for a cozy feel.
Why Sage Green Tiles Matter: Sage green tiles are a trendy choice, offering a soothing touch that beautifully complements warm wood cabinetry. This color enhances the warmth of your kitchen, creating a cozy and inviting atmosphere that feels both modern and timeless.
What People Rarely Consider is how lighting can dramatically change the perception of sage green. For instance, during the day, natural light can make the tiles appear brighter, while artificial light may cast a different shade. Testing out paint samples or tile pieces in your kitchen's lighting helps ensure a harmonious look.
This product adds a luxurious touch to walls, enhancing the warmth of sage green.
View on Amazon →These tiles provide a stylish look that's easy to install, perfect for any kitchen.
View on Amazon →A great option to add elegance with unique patterns and styles for any kitchen.
View on Amazon →🚀 Quick Tips:
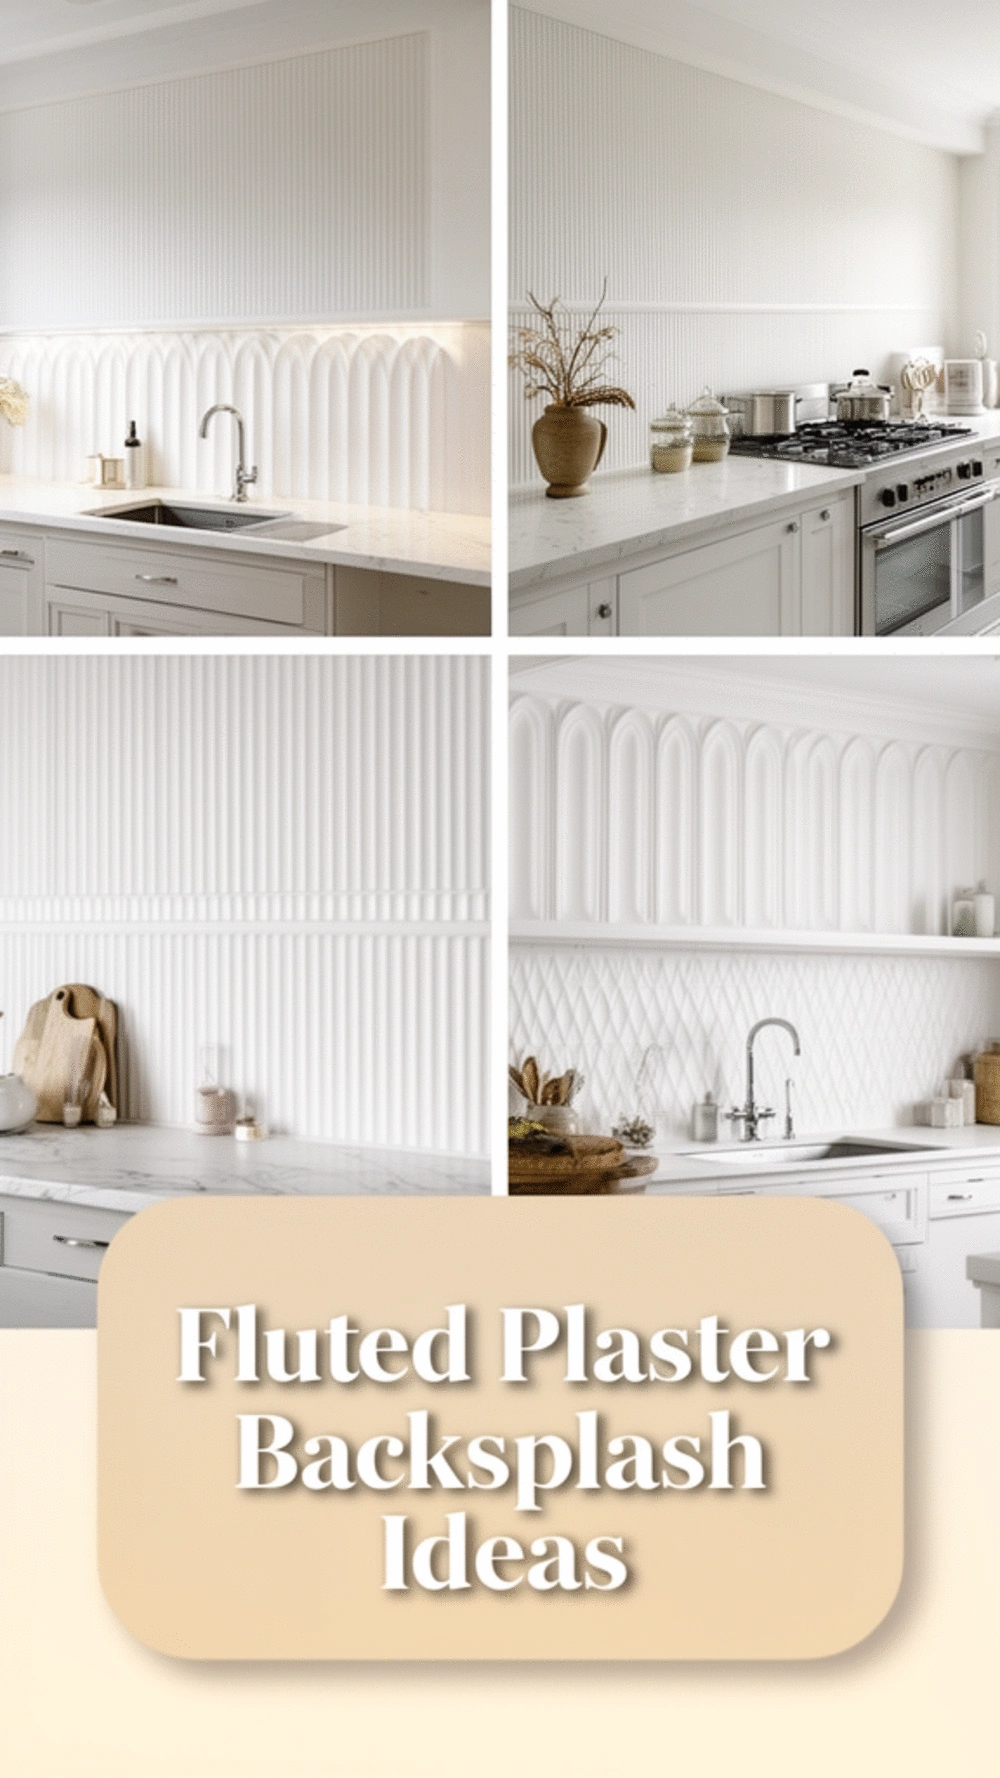
Transform your kitchen with elegant fluted plaster for a timeless touch.
The Appeal of Fluted Plaster Backsplashes: Fluted plaster panels bring a unique texture and sophistication to your kitchen walls. Their soft linen white finish not only brightens the space but also creates a stunning visual effect. This elegant design is perfect for modern and traditional kitchens alike, adding depth and character.
What Most People Overlook: Many homeowners underestimate the architectural impact of fluted designs, thinking they are too ornate for everyday kitchens. However, when styled appropriately, they can serve as a minimalist focal point that enhances your kitchen's overall aesthetic without overwhelming it. For instance, pairing these panels with sleek cabinetry beautifully balances modern practicality with classic charm.
These 3D slat panels enhance your kitchen with a modern touch and are easy to install.
View on Amazon →💡 Your Quick Start Guide:
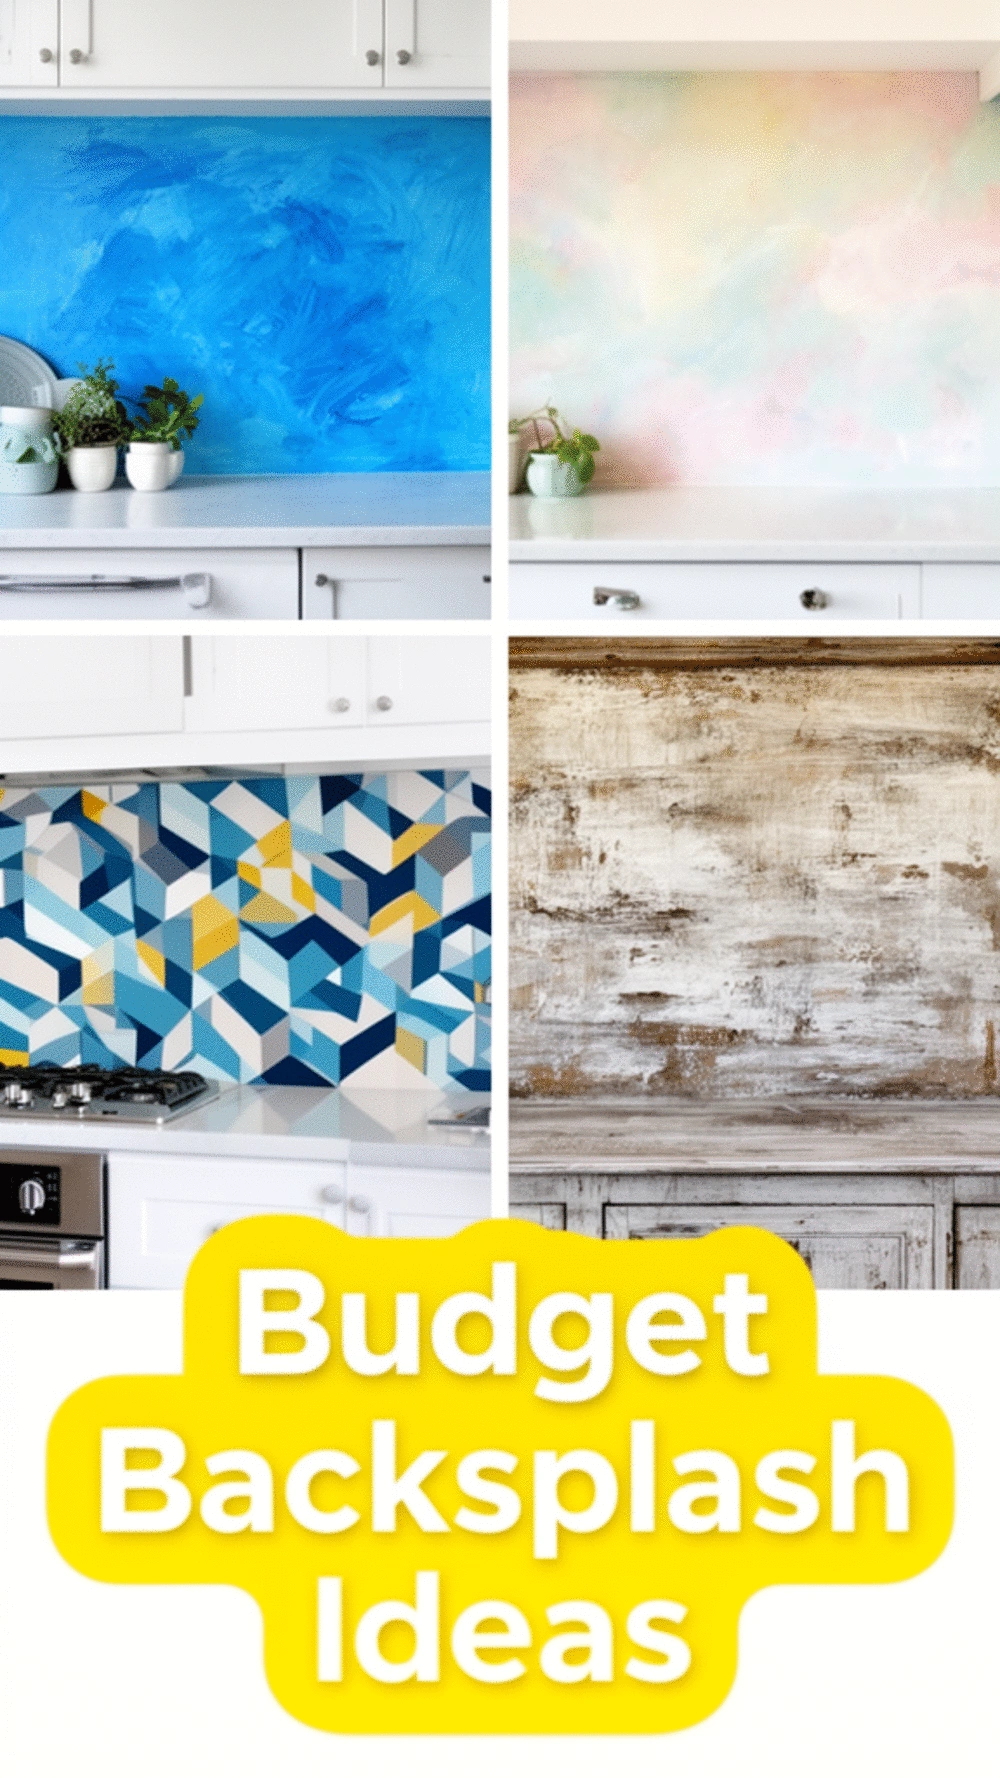
Transform your kitchen with a DIY painted backsplash for under $20!
Why a Painted Backsplash Matters: The cost-effective strategy of a painted backsplash allows homeowners to easily customize their kitchen spaces without breaking the bank. With minimal supplies needed, such as paint and a brush, you can create a stunning focal point that expresses your personal style while ensuring durability and low maintenance.
What people often overlook is the importance of selecting the right paint type. Many rush to grab the cheapest option without considering that kitchen environments require durable, washable finishes. For instance, using a standard wall paint can lead to peeling and fading over time. Instead, opt for a high-quality, washable paint designed for kitchen use to ensure longevity and ease of cleaning.
This self-adhesive film protects surfaces, making it ideal for painted backdrops in kitchens.
View on Amazon →These tiles offer a textured design that enhances any kitchen with minimal effort.
View on Amazon →This contact paper provides a removable and stylish alternative for renters looking to upgrade.
View on Amazon →🚀 Quick Tips to Get Started:
You now have seven inspiring options for transforming your kitchen with a stunning backsplash. Focus on what feels right for you—whether that’s one small change or a combination of a couple of ideas.
Each thoughtful adjustment will bring you closer to a space that reflects your style and warmth. Your kitchen can become a true reflection of you with just a little intention and creativity.